Make installing furniture bolts go smoothly. Avoid cross-threading and other pitfalls common to furniture bolts.
Furniture bolt is the shorthand for a commonly used socket head and barrel nut combo often seen in flat-pack furniture. It’s also called a Joint Connector Bolt, or JCB.
Furniture bolts are popular because they make assembly and disassembly easy, while providing a secure connection between parts. The low profile head offers a clean appearance, and typically has a hex socket for tightening.

- 2x 4mm hex key

It is important to use the right size hex key. If you use a hex key that's too small, it can round out the corners of the hex socket making it unusable. This can also happen if you over tighten the bolts.
All Grid Kit furniture bolts use a 4mm hex key.
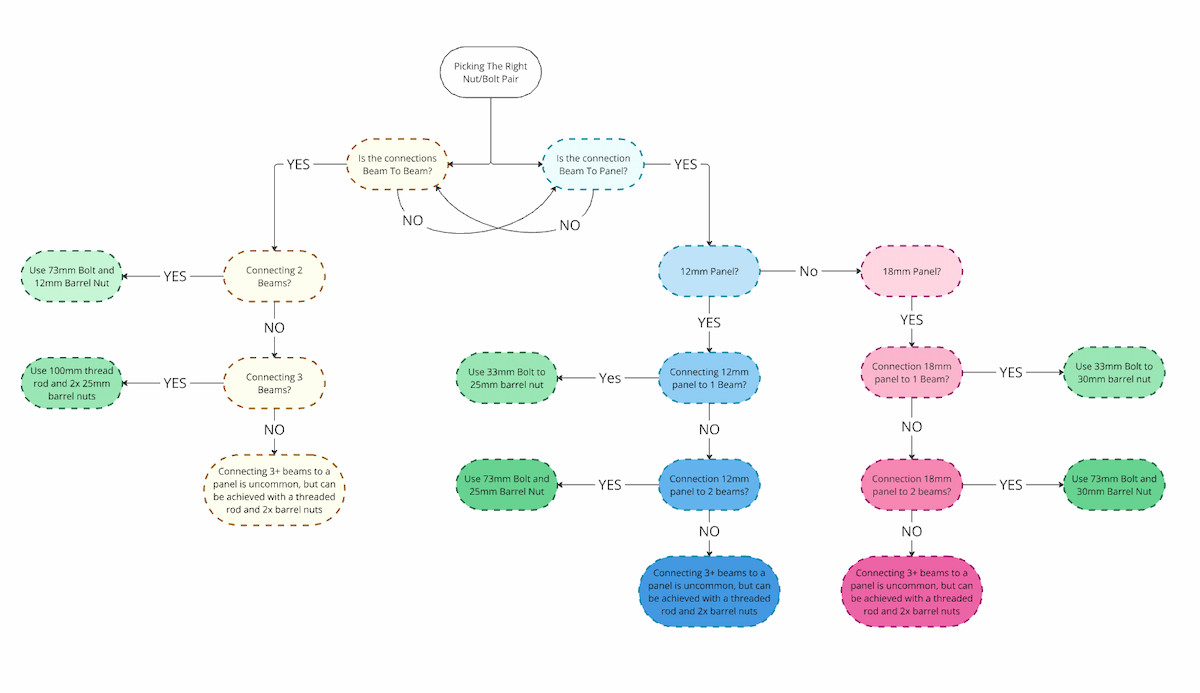
With Grid Kit there are a few different scenarios that use different bolt/nut combinations.
- Beam to beam
- Beam to 12mm panel
- Beam to beam to 12mm panel
- Beam to 18mm panel
- Beam to beam to 18mm panel
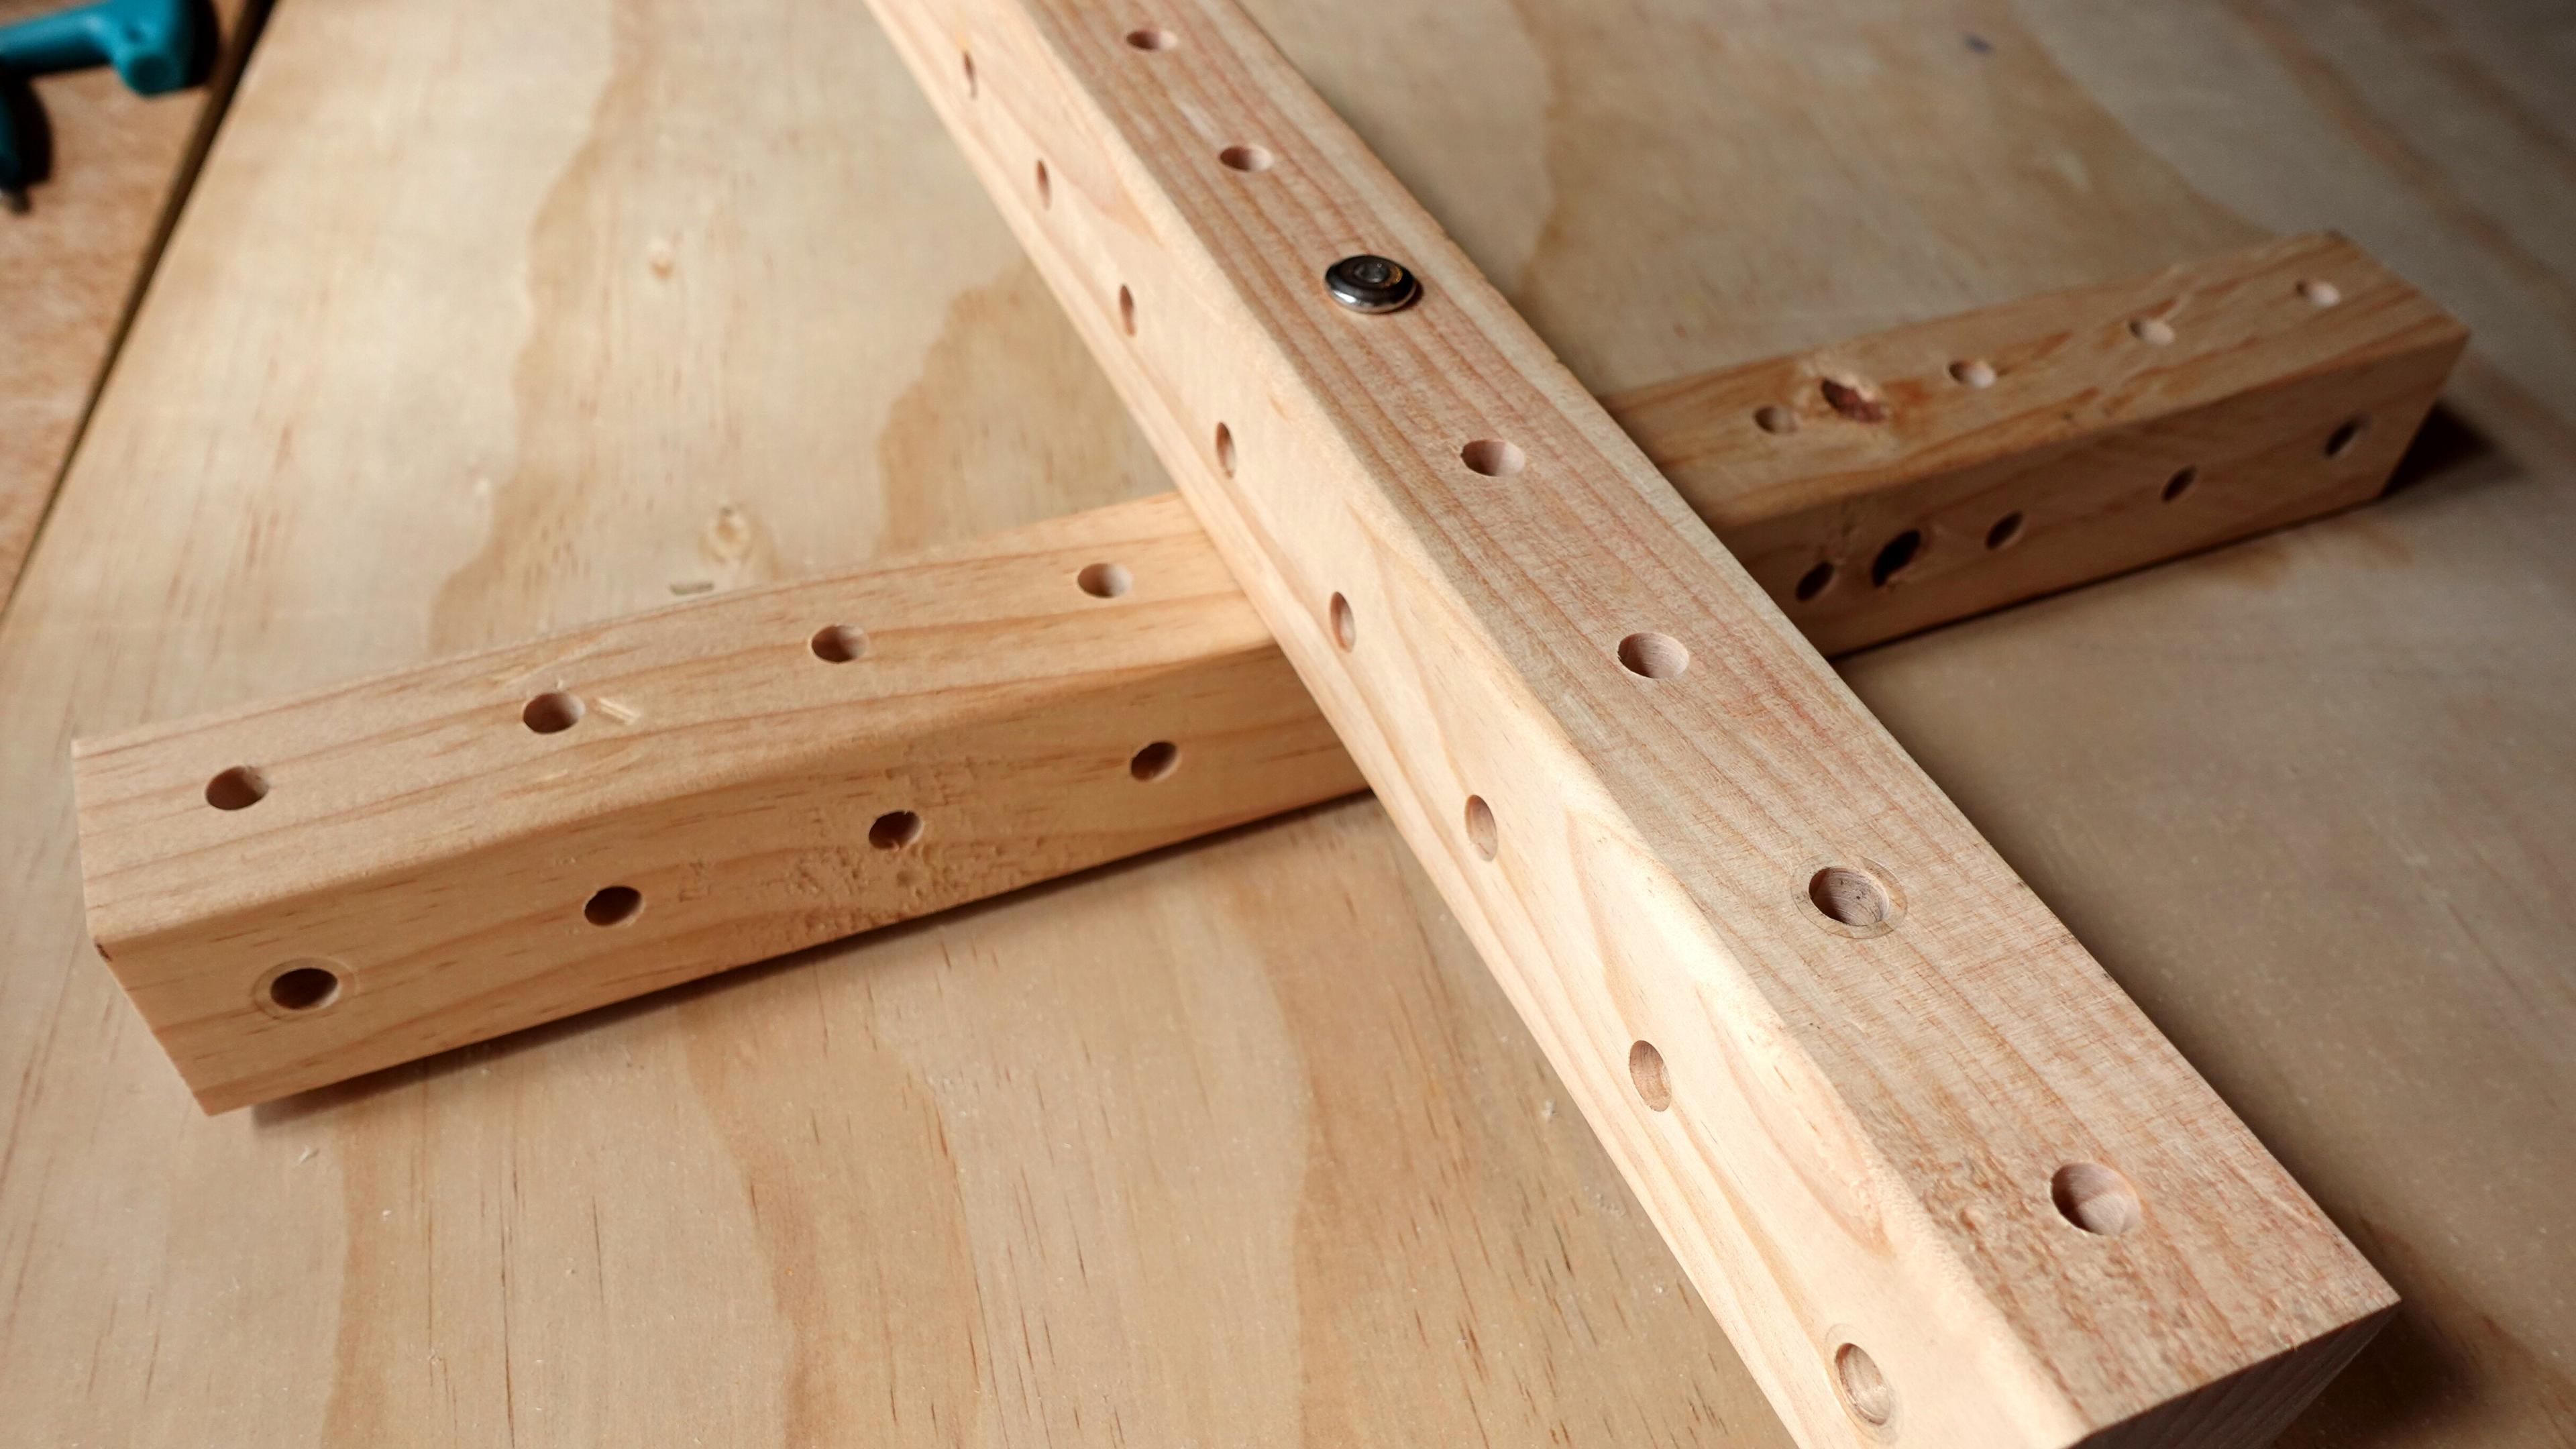

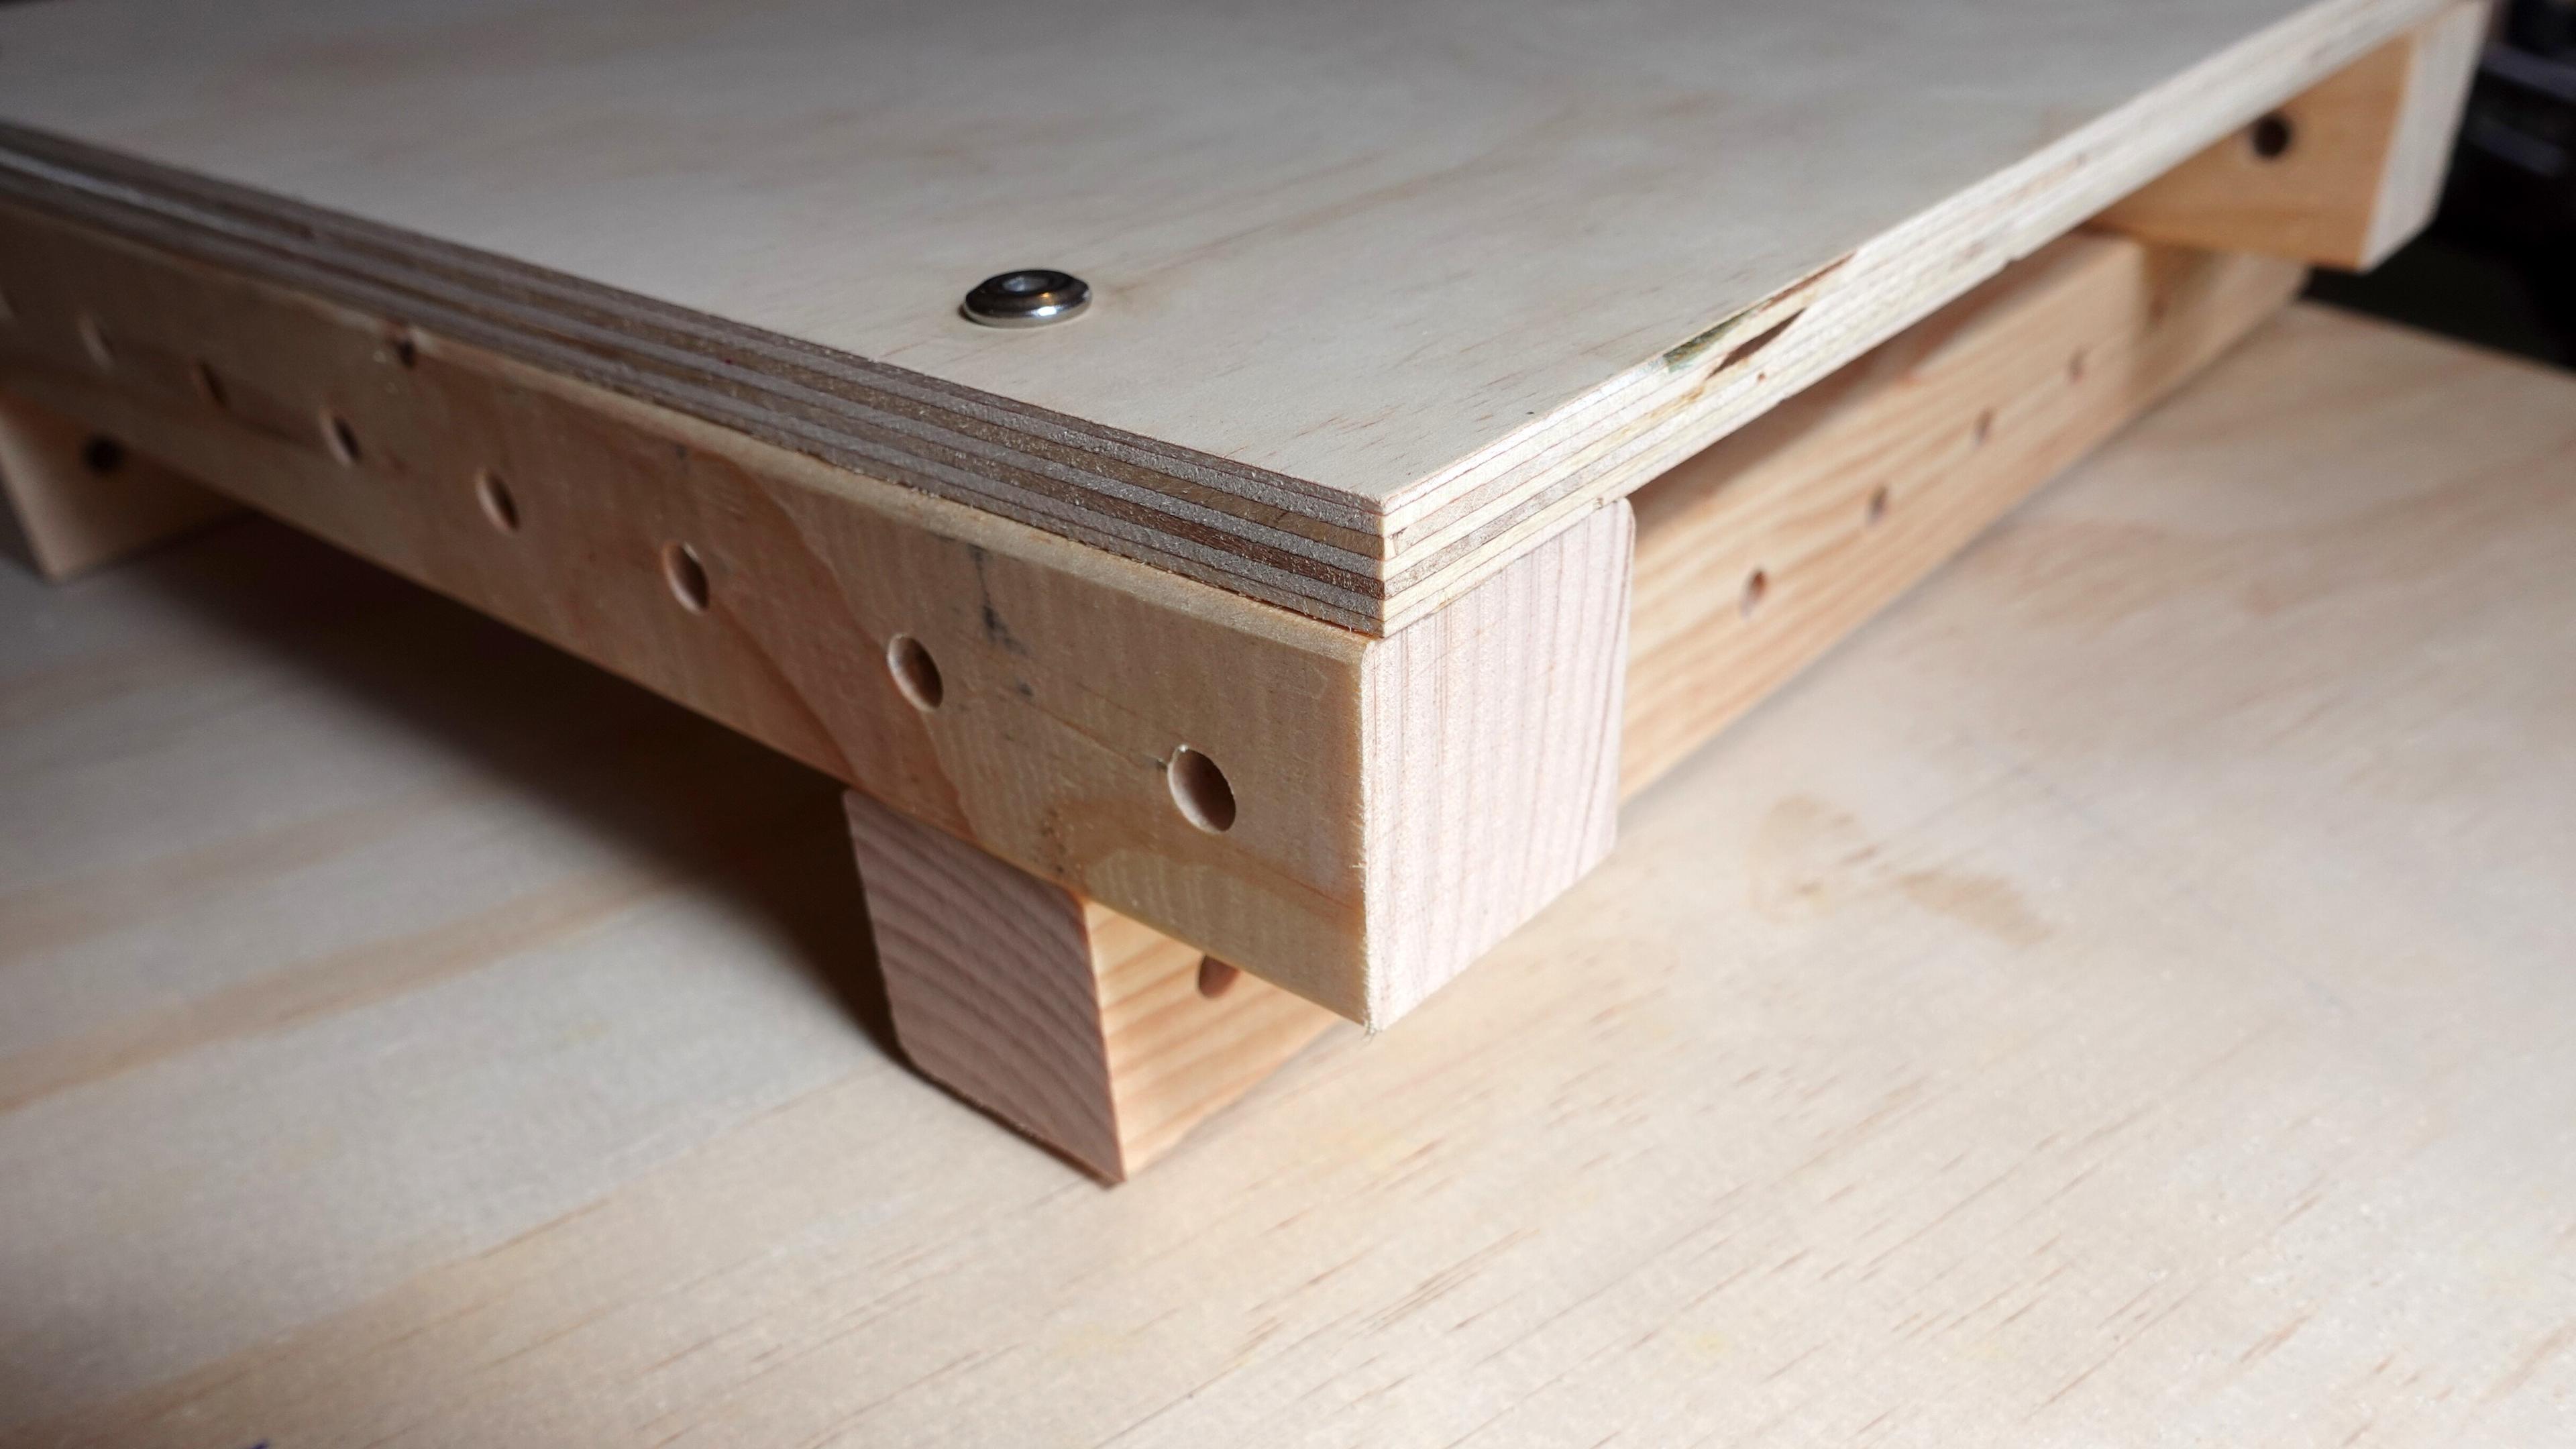
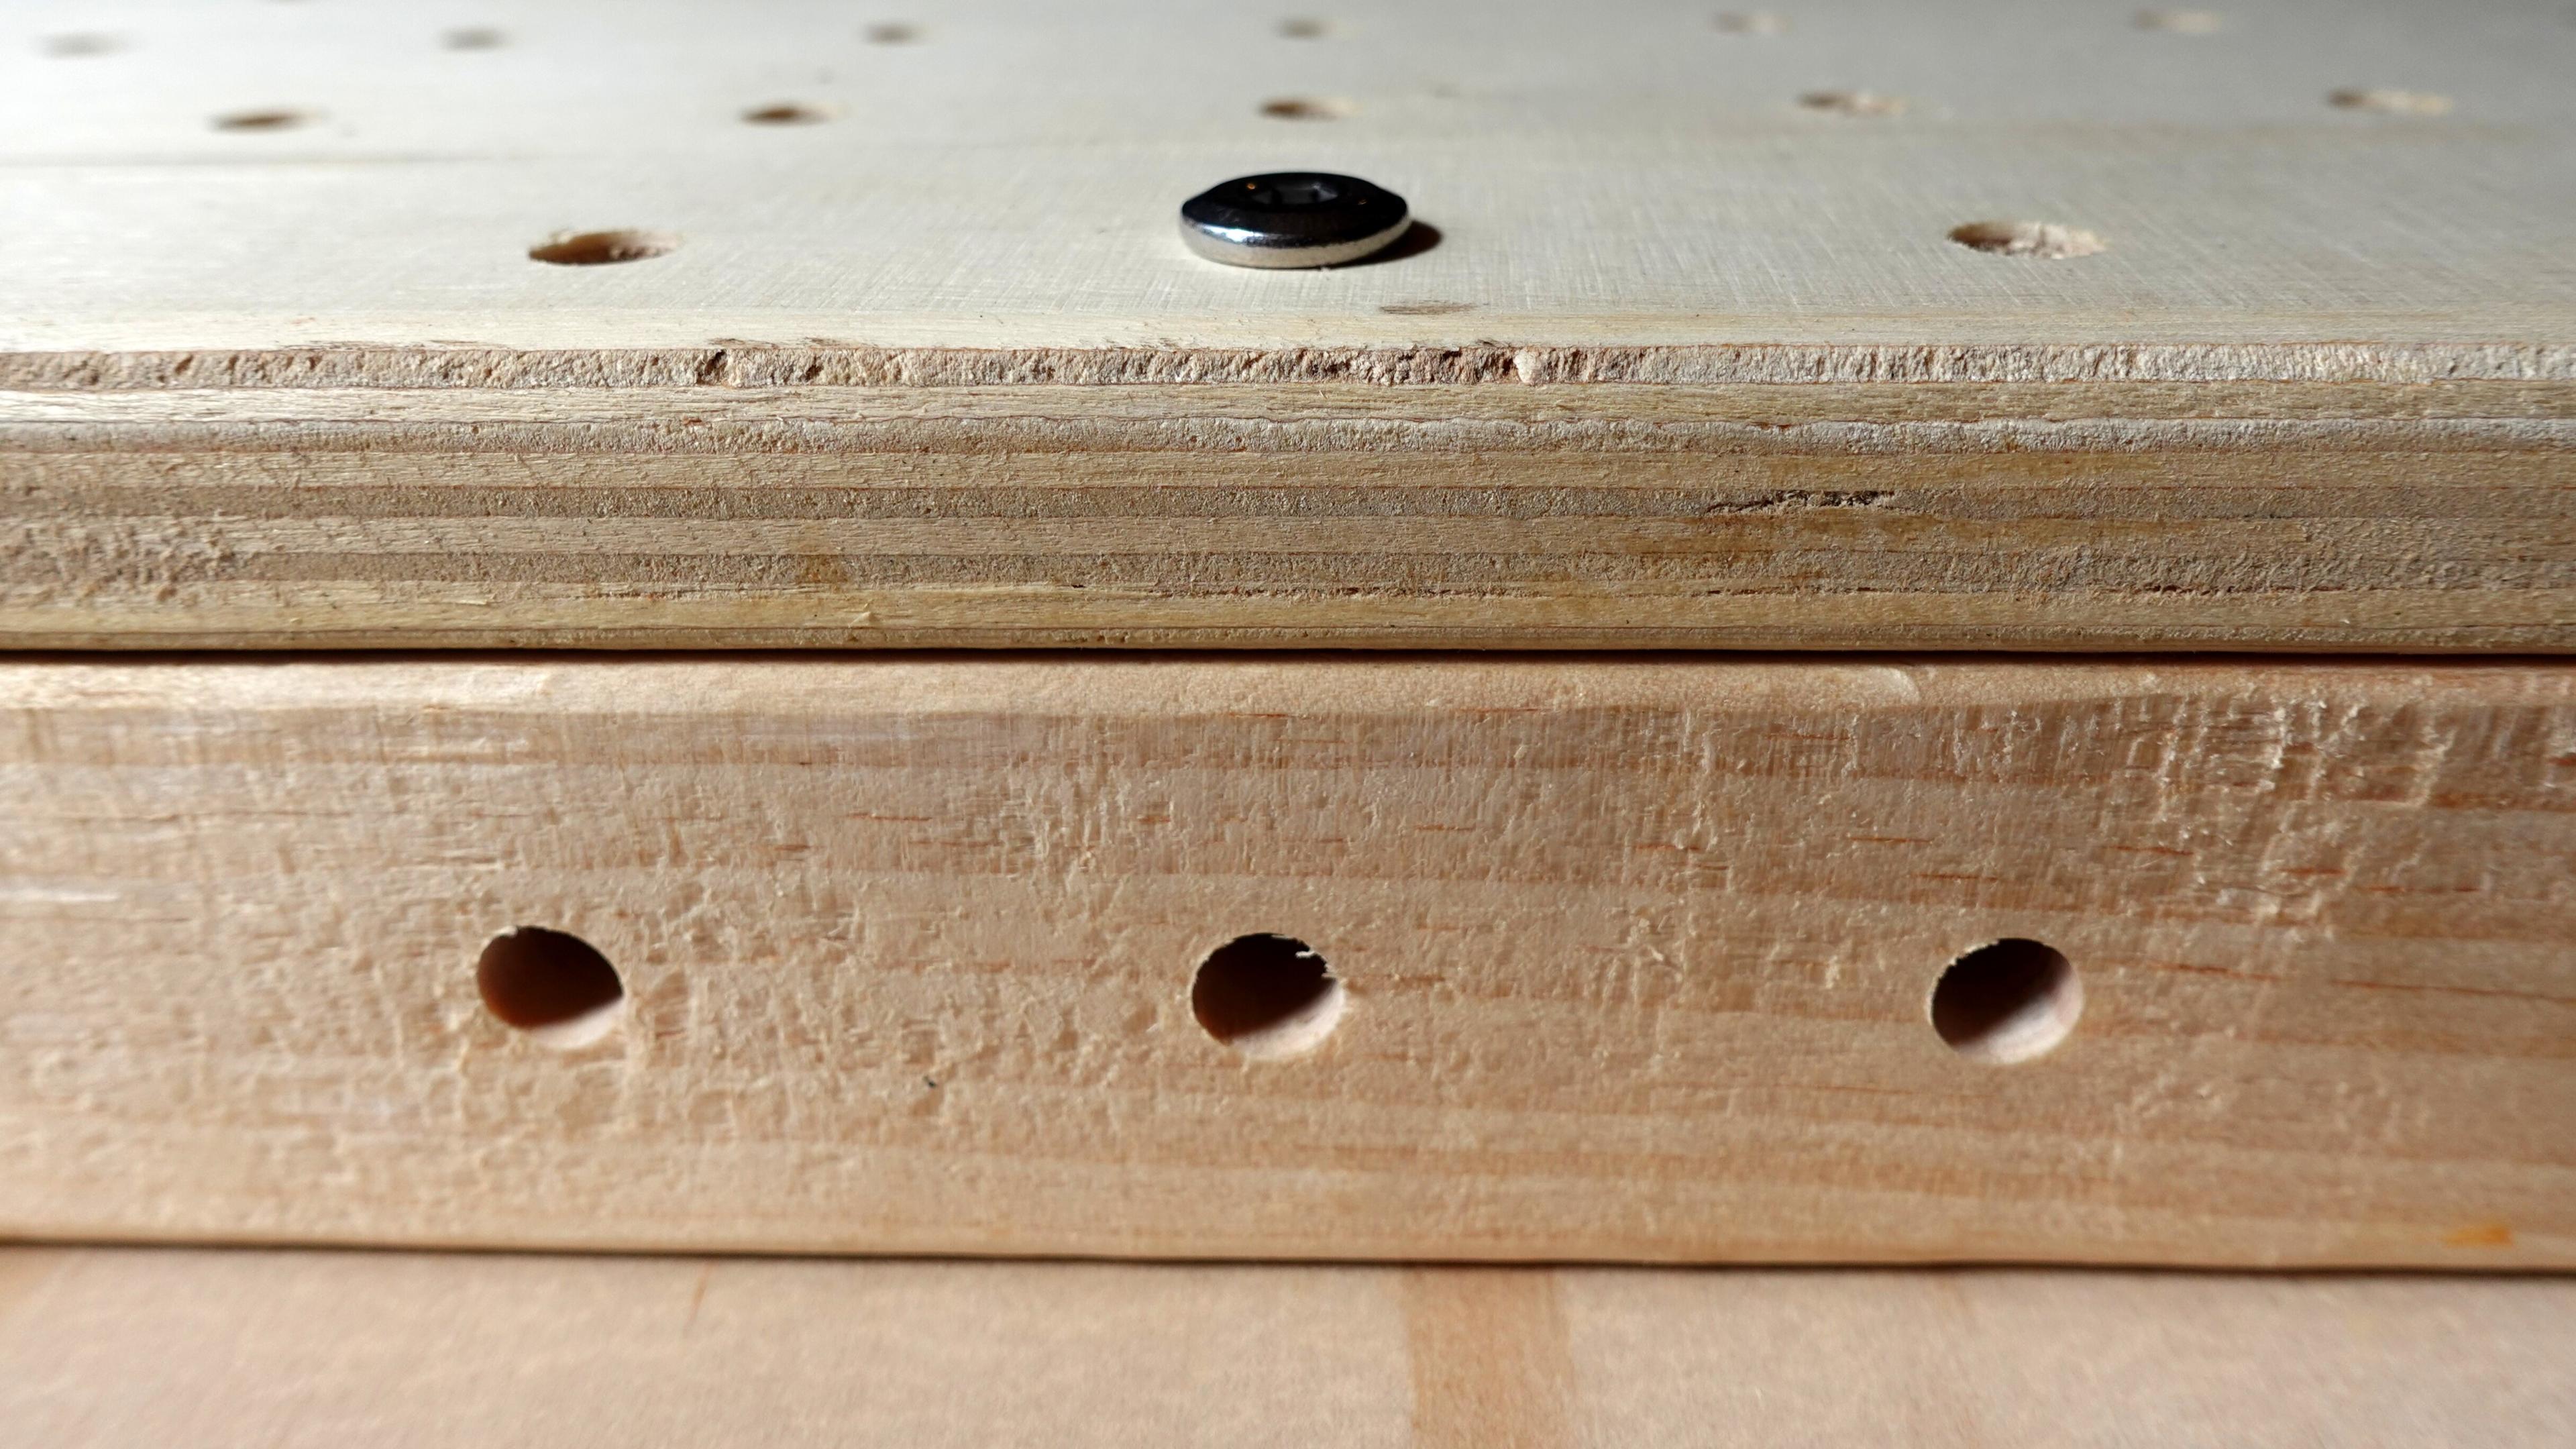
All of these common scenarios can be made with just 2 sizes of bolt and 3 sizes of barrel nut
Bolts
- 33mm length M6 bolt
- 73mm length M6 bolt
Nuts
- 12mm length M6 barrel nut
- 25mm length M6 barrel nut
- 30mm length M6 barrel nut

Grid Beam : Grid Beam
- 73mm length M6 bolt
- 12mm length M6 barrel nut

Grid Beam : 12mm Panel
- 33mm length M6 bolt
- 25mm length M6 barrel nut

Grid Beam : Grid Beam : 12mm Panel
- 73mm length M6 bolt
- 25mm length M6 barrel nut

Grid Beam : 18mm Panel
- 33mm length M6 bolt
- 30mm length M6 barrel nut

Grid Beam : Grid Beam : 18mm Panel
- 73mm length M6 bolt
- 30mm length M6 barrel nut

How many beams?
- 1 beam = 33mm length M6 bolt
- 2 beams = 73mm length M6 bolt
For other less common scenarios like 3+ beam connections larger 113mm bolts or threaded rods can be used.
Which panel?
- No Panel = 12mm length M6 barrel nut
- 12mm Panel = 25mm length M6 barrel nut
- 18mm Panel = 30mm length M6 barrel nut
- First put the bolt through the connection you would like to make. Then insert the barrel nut from the opposite side until the bolt and nut meet.
Listen For The Click (How To Avoid Cross-Threading)
- Before starting to tighten the bolt, press the nut and bolt together and twist the nut and/or bolt counterclockwise until you hear an audible click. This is the sound of the start of the threads aligning. If you do not hear this sound your bolt and nut may not be aligned. If you start to tighten before you hear this click there is a risk of cross threading the nut and bolt. This will damage the threads and make it very difficult or impossible to install.
- After you hear the click start tightening the bolt. It should be easy to tighten by hand for the first few rotations of the bolt.
Troubleshooting: If you don’t hear a click there are a few things to check.
- Make sure there is no debris between the bolt and the nut.
- check that you have the right nut/bolt combo for the connection
- Nut and bolt may not be aligned and seated correctly. Try moving the bolt around, to adjust the alignment.
- Other installed bolts may be overly tightened causing a misalignment of the joint currently being assembled.
Loose Fit
- Once the bolt/nut pair has been tightened by hand, continue assembling the rest of your project before tightening the joint with the 4mm hex keys. If you tighten your joints as you go, it may be difficult to connect some joints later in the assembly process.
Final Tightening
- Once your project has been assembled it’s now time to tighten all of the joints using a 4mm hex key on the nut and on the bolt side to tighten the joint the rest of the way. If you only use a hex key on one side (e.g. Hex key on Just the bolt side or just the nut side), the bolt will spin endlessly.
Maintenance Tightening
- Because wood can compress under pressure, you may need to retighten the bolts after a few days. Repeat this process until the wood has fully compressed and is stable.
For further tips, advice, and inspiration, visit the Grid Kit discussion board.
